How to connect a headset to a Motorola CLS1410?
This step-by-step guide outlines the process of connecting a headset to a Motorola CLS1410 radio, designed to help users configure their communication setup for optimal performance. The guide details the necessary steps to ensure a seamless connection, promoting clear and hands-free communication. By following these instructions, users can efficiently integrate their headsets with the Motorola CLS1410, enhancing their overall communication experience.
Gather Required Equipment
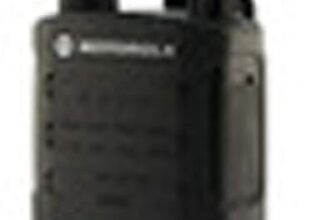
Gather the required equipment by first locating your Motorola CLS1410 radio. Ensure that the model number is correct, as using a different model may result in compatibility issues. Next, secure a compatible headset that will connect seamlessly with your radio.
Check the specifications of your headset for the following:
- Connector Type: Verify that the headset features a 2-pin connector, essential for interfacing with the CLS1410.
- Comfort Level: Choose a headset that fits comfortably for extended use.
- Noise Cancellation: Look for features that reduce background noise, enhancing communication clarity.
Once you have both the radio and the headset ready, you can proceed to the next steps in your setup.
Locate the Headset Jack
Check the left or right side of the Motorola CLS1410 radio. Feel along the edge of the device for a small round port, which is the headset jack. This is where you’ll connect your headset for clear communication. Ensure you have a headset compatible with this model, as using the right accessories will enhance your experience.
Align your headset plug with the headset jack you located. Push until you hear or feel a slight click, indicating that it’s securely connected. Avoid using excessive force, as this could damage the port or your headset. Once connected, adjust the volume to your preference, and you’re ready to enjoy hands-free communication.
Insert the Headset Connector
Choose the headset connector you want to use and line it up with the headset jack on the Motorola CLS1410. Hold the connector firmly, and position it so that it directly faces the jack. This alignment is crucial for ensuring a smooth connection. With a steady hand, insert the connector into the jack, applying gentle pressure. Ensure that you’re not forcing it, as this could damage the port.
Push the connector in securely until you feel or hear a slight click, indicating that it has seated properly. Once inserted, give it a gentle tug to confirm that it’s firmly connected and won’t come loose during use. A secure connection is essential for clear audio and effective communication, so take your time to make sure it’s done correctly.
Adjust the Volume Settings
Connect the headset to the Motorola CLS1410, ensuring a secure fit. Locate the volume knob on the side of the radio, and adjust the volume to suit your preferences. Turn the knob clockwise to increase the sound level for clearer communication, or counterclockwise to decrease the volume if it’s too loud. It’s essential to find a comfortable audio level to avoid straining your ears during extended use.
Monitor your surroundings while adjusting the volume. If you are in a noisy environment, you may need to increase the volume more significantly for clarity. Conversely, if you’re in a quieter area, reducing the volume can enhance your listening experience. Pay attention to the feedback from your headset as you fine-tune the settings to ensure optimal performance and comfort.
Test the Connection
Speak into the microphone while wearing the headset. Notice if your voice is clearly audible in the headphones. If not, check the connection to the device and ensure that the microphone is properly positioned near your mouth. Adjust the microphone’s position if it seems too far away or angled incorrectly. Listen closely for any distortion or background noise; these can indicate placement issues or interference.
Adjust the volume settings on your device or on the headset itself. Increase the volume gradually until you find a comfortable listening level that allows you to hear audio clearly without straining. If you notice any echo or feedback, decrease the volume slightly to find the optimal balance. Repeat the speaking test after making adjustments to ensure the sound is clear and crisp. Continue this process until the headset is functioning at an ideal level for your needs.
Final Thoughts on Connection
In conclusion, connecting a headset to a Motorola CLS1410 is a simple and effective way to improve our communication experience. By following the outlined steps, we can easily set up our headsets for enhanced audio quality and clearer conversations. Whether for work, events, or personal use, this connection allows us to communicate more efficiently and comfortably. More info is available at Motorola Solutions. Happy communicating!